X (former Twitter) Login flow reconstruction. Episode 1 — Headers generation
Today post is the first of a small serie about X / Twitter login automatisation. In this episode I’m going to reverse engine all the X / Twitter headers…
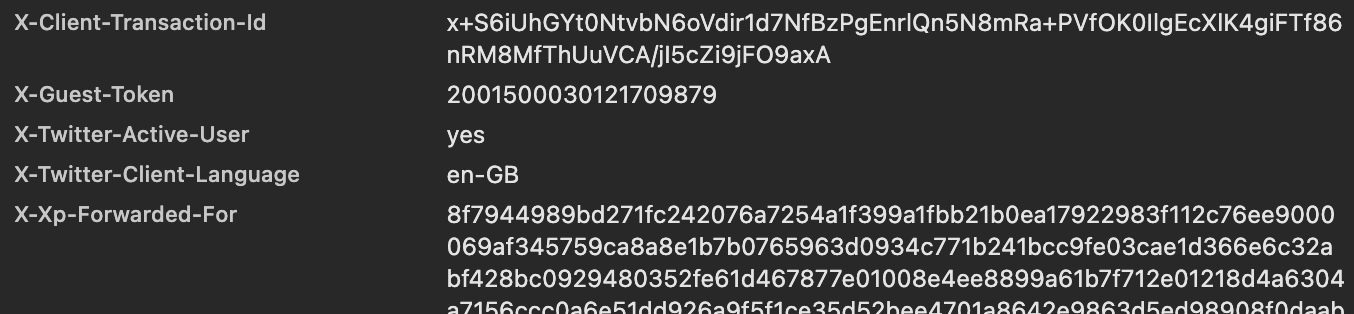
Today post is the first of a small serie about X / Twitter login automatisation. In this episode I’m going to reverse engine all the X / Twitter headers required for the login flow. At the end of the serie we’ll have a full login script in python non-browser dependent.
Check this episode GitHub repo with full study and its Python module
X-Client-Transaction-Id
This token gets generated for each request based on 3 main things:
- Request details (METHOD and URL)
- Fingerprint based on a loaded (a meta tag called “twitter-site-verification” and a “dynamic” js file)
- Current timestamp
The original code looks like this
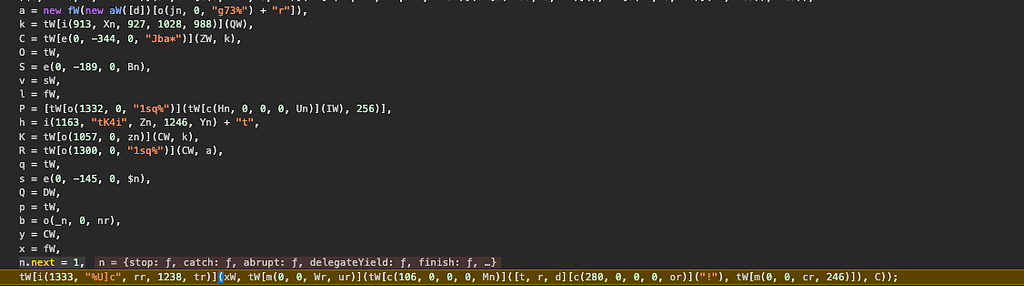
After a bit of cleaning up we get this more redable snippet
// Calculate seconds elapsed since reference timestamp (April 2023)
var secondsSinceEpoch = Math.floor((Date.now() - 1682924400 * 1000) / 1000);

// Convert timestamp to bytes (Float64 → Uint8Array)
var timestampBytes = new Uint8Array(new Float64Array([secondsSinceEpoch]).buffer);

// Get fingerprint from DOM element
var fingerprint = new Uint8Array(atob(
    document.querySelectorAll("[name^=tw]")[0].getAttribute("content")
)["split"]("")["map"](function (n) {
    return n["charCodeAt"](0);
}));

var fingerprintHash = generateFingerprintHash(fingerprint);

// Random salt for the payload
var randomSalt = [Math.random() * 256];

// Convert fingerprint and timestamp to arrays
var fingerprintArray = Array.from(fingerprint);
var timestampArray = Array.from(timestampBytes);

// Build the hash input: "param2!param1!timestamp" + "obfiowerehiring" + fingerprintHash
var hashInput = [t, r, secondsSinceEpoch].join("!") + "obfiowerehiring" + fingerprintHash;

// Compute SHA-256 hash asynchronously
var hashResult = crypto.subtle.digest("sha-256", new TextEncoder().encode(hashInput));

// Build the final payload by concatenating:
// [randomSalt, fingerprintArray, timestampArray, transformed(slice16(arrayFrom(hashBytes).concat(HW))), 3]
var hashBytes = new Uint8Array(hashResult);
var hashArray = Array.from(hashBytes);
var transformed = hashArray.concat(HW)["slice"](0, Math.pow(2, 4));  // Take first 16 bytes

var payload = randomSalt.concat(fingerprintArray, timestampArray, transformed, [3]);

// Encode as base64 with optional XOR and return
var finalBytes = new Uint8Array(payload);

// base64 encode with optional XOR
MW = function (n, r, t) {
    return r ? n ^ t[0] : n;
}
sW = function (n) {
    return btoa(Array.from(n)["map"](function (n) {
        return String["fromCharCode"](n);
    })["join"](""))["replace"](/=/g, "");
}
var encoded = sW(finalBytes.map(MW));
You can find the full code, as well as the generateFingerprintHash part (a pretty base fingerprint based on css animations) on my github repo.
So, how do we solve this one?
Pretty straight forward to the result, we simply need to recreate the same hash based on the action we are taking and implement in it time and animation key, here’s an example
def _generate_transaction_id(self, method: str, path: str) -> str:
    # Calculate current time offset
    time_now = floor((time() * 1000 - 1682924400000) / 1000)
    time_now_bytes = [(time_now >> (i * 8)) & 0xFF for i in range(4)]

    # Generate hash
    hash_val = sha256(
        f"{method}!{path}!{time_now}obfiowerehiring{self.animation_key}".encode()
    ).digest()

    # Build final byte array with XOR encoding
    random_num = randint(0, 255)
    bytes_arr = [*self.key_bytes, *time_now_bytes, *list(hash_val)[:16], 3]
    out = bytearray([random_num, *[b ^ random_num for b in bytes_arr]])

    return b64encode(out).decode().rstrip("=")

# Example usage
self._generate_transaction_id(
    method='POST',
    path='/1.1/onboarding/task.json'
)
The animation part, as well as the full code can be found in my repo.
X-Guest-Token
Generated from a
POST https://api.x.com/1.1/guest/activate.json
pretty simple and straight forward, we can skip this one and proceed.
X-Xp-Forwarded-For
Let’s take a look into the source code:
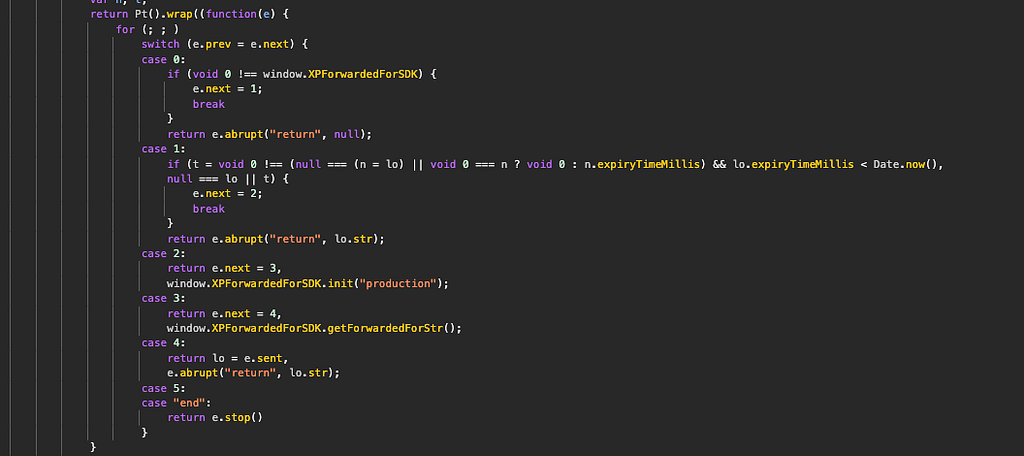
So, we need to analyze this window.XPForwardedForSDK that by a first look seems to have couple of attributes and there’s a WASM script involved
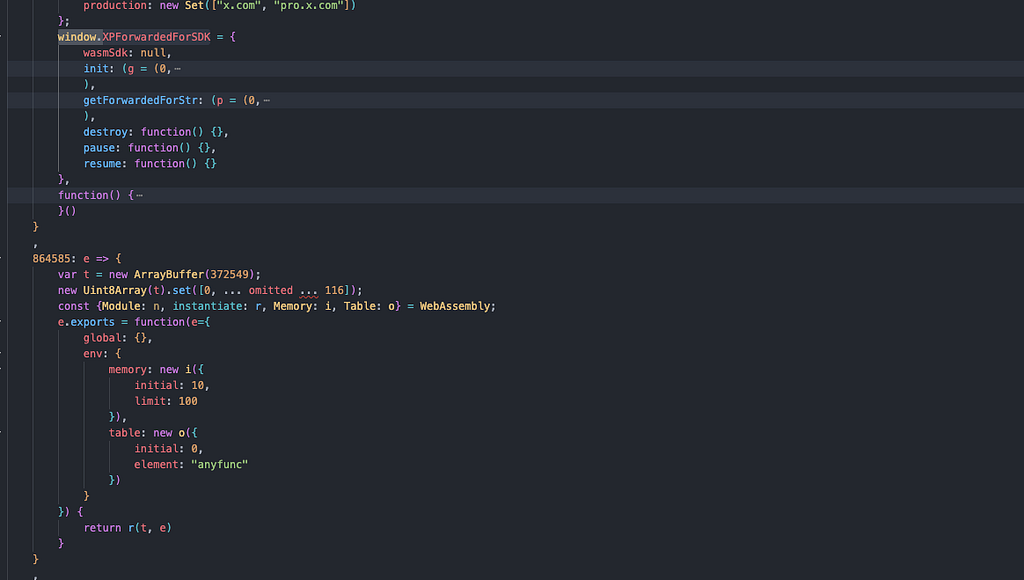
The main attributes that are important to us are:
- init(environment)
Loads the WASM runtime - getForwardedForStr()
Returns us a dict containing the important string and the expiring time
Obv since is prettye verything wasm based we need to understand what it does.
1. Decompiling the WASM script
After extracting and parsing the script via a simple snippet such as
const fs = require('fs');
const code = fs.readFileSync('x_xp_forwarded_for.js', 'utf8');

// Find the WASM bytes array using regex
const match = code.match(
    /864585:\s*e\s*=>\s*\{[^}]*var\s+t\s*=\s*new\s+ArrayBuffer\((\d+)\);\s*new\s+Uint8Array\(t\)\.set\(\[([^\]]+)\]/s
);

if (match) {
    const size = parseInt(match[1]);
    console.log('WASM size:', size, 'bytes');

    // Parse the bytes
    const allBytes = match[2].split(',').map(b => parseInt(b.trim()));
    const buffer = Buffer.from(allBytes);

    // Save to file
    fs.writeFileSync('xpforwarded.wasm', buffer);
    console.log('Saved to xpforwarded.wasm');
}
We can proceed converting the binary WASM to redable text via the usefull tool wasm2wat as
wasm2wat xpforwarded.wasm -o xpforwarded.wat
We now have a way better view of the situation
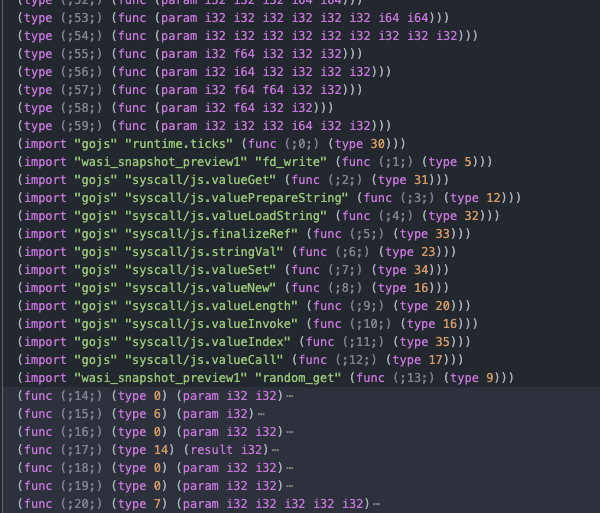
We can already point out the fact that is a GO based script this make our debug process a way easier.
2. Analyzing WAT Data Segments
The WAT files contains data segments with embed strings
(data (;0;) (i32.const 65536) "expand 32-byte k...")
(data (;1;) (i32.const 65842) "meta\00invalid syntax0123456789abcefz...")
the main discoveries I’ve done was:
| String                                      | Interpretation               |
|---------------------------------------------|------------------------------|
| `forwarded-for-sdk/javascript_fingerprint`  | Go package name              |
| `crypto/aes`, `crypto/internal/fips140/aes` | AES encryption used          |
| `crypto/internal/fips140/aes/gcm`           | GCM mode specifically        |
| `crypto/internal/fips140/sha256`            | SHA-256 hashing              |
| `documentcookie;=guest_id`                  | Cookie extraction logic      |
| `navigatoruserActivationhasBeenActive`      | User interaction check       |
| `userAgentwebdriverundefined`               | Bot detection via webdriver  |
| `getForwardedForStr`                        | Exported JS function name    |
| `strexpiryTimeMillis`                       | Return object properties     |
| `json:"navigator_properties"`               | JSON field tag               |
| `json:"created_at"`                         | JSON field tag               |
We are almost set, let’s try to extract the encryption key used for the AES encryption in order to have everything
strings xpforwarded.wasm | grep -E "^[0-9a-f]{64}$"

# that will output
0e6be1f1e21ffc33590b888fd4dc81b19713e570e805d4e5df80a493c9571a05
3. Understanding the Go Runtime
A bit of theory is always needed in order to figure out the situation
Go compiles to WASM using the GOOS=js GOARCH=wasm target. This requires:
- A JavaScript file that implements the gojs imports
- Go manages its own memory within WASM linear memory, so a amanger is required
- The syscall/js package provides bidirectional communication
**Value Reference System
**Go WASM uses a reference system to pass values between Go and JavaScript:
// Values are stored in an array, indexed by IDs
this._values = [
    NaN,        // 0: reserved
    0,          // 1: zero
    null,       // 2: null
    true,       // 3: true
    false,      // 4: false
    globalThis, // 5: global object
    this        // 6: Go instance
];
When Go calls syscall/js.valueGet(obj, “property”):
- Go passes the object reference ID
- The JS glue code looks up the object in
_values - Gets the property
- Stores the result in
_valuesand returns the new ID
**Asyncify Transform
**The WASM module uses Binaryen’s asyncify transform to handle async JavaScript operations:
(export "asyncify_start_unwind" (func 436))
(export "asyncify_stop_unwind" (func 437))
(export "asyncify_start_rewind" (func 438))
This allows the Go code to await JavaScript Promises, which is necessary for:
- crypto.subtle.encrypt()
- crypto.subtle.digest()
4. The reverse engineering methodology
The approach I’m going to use in order to recreate this wasm correctly, is without using the file directly at all. Would be too easy to just make a simple JS script running the file with a correct env. I actually want to recreate everythign from scratch. Let’s proceed.
**Evidence 1: Embedded Strings
**The most powerfull technique for analyzing GO binaries is extracting and analyizing embedded strings, such as:
- Package names
- Error messages
- JSON struct tags
- Type names
Let’s extract everything via a single command
strings xpforwarded.wasm | grep -v "^.$" | sort -u > all_strings.txt
Now let’s study them
| String Found                           | What It Tells Us
|----------------------------------------|
| `json:"navigator_properties"`          | There's a Go struct with a field that serializes to `navigator_properties`
| `json:"user_agent"`                    | Nested struct has `user_agent` field
| `json:"has_been_active"`               | Boolean field for user activation
| `json:"webdriver"`                     | Boolean field for bot detection
| `json:"created_at"`                    | Timestamp field
| `navigatoruserActivationhasBeenActive` | Concatenated JS property access path
| `userAgentwebdriverundefined`          | More JS properties being accessed
| `getForwardedForStr`                   | The exported function name
| `strexpiryTimeMillis`                  | Return object has `str` and `expiryTimeMillis` keys
The logic we’ll be using is
json:"navigator_properties" + json:"user_agent" + json:"has_been_active" + json:"webdriver"
                                        ↓
                        NavigatorProperties struct with 3 fields

json:"navigator_properties" + json:"created_at"
                    ↓
        ClientSignals struct wrapping NavigatorProperties
**Evidence 2: Package paths
**Go binaries embed full package paths:
strings xpforwarded.wasm | grep "crypto/"
# Returns
crypto/aes                       -> Uses AES encryption
crypto/cipher                    -> Uses cipher modes (block cipher interface)
crypto/internal/fips140/aes
crypto/internal/fips140/aes/gcm  -> Specifically GCM mode
crypto/internal/fips140/sha256
**Evidence 3: Error messages
**Error reveal us the functions behaviors
strings xpforwarded.wasm | grep -i "error"

// returns
error creating AES cipher:
error creating GCM:
Error encrypting data:
So we could already guess that there’s a logic like
// Error message "error creating AES cipher:" implies:
block, err := aes.NewCipher(key)
if err != nil {
    return nil, fmt.Errorf("error creating AES cipher: %w", err)
}

// Error message "error creating GCM:" implies:
gcm, err := cipher.NewGCM(block)
if err != nil {
    return nil, fmt.Errorf("error creating GCM: %w", err)
}
And so on, take a look to the github repo about it for a full reconstruction logic of the original GO script and the conversion into Python / NodeJS. As well as the python module twitter-generator for generating those headers easily
What’s next?
We have terminated the headers generation part, be sure to check the full repo on Github.
Next step is proceeding with the first antibot challenge. Be sure to subscribe to my newsletter in order not to miss it.
Connect with me
If you enjoyed this article, follow me on GitHub and on Medium to receive notifications whenever I post or open-source something, or buy me a coffee to keep me up.
Skip the reverse-engineering.
Takion returns fresh cookies, headers, and tokens for every major antibot wall. One POST, no browser, first call within the hour.